Mini Weasley Sweater Ornaments Pattern and Video

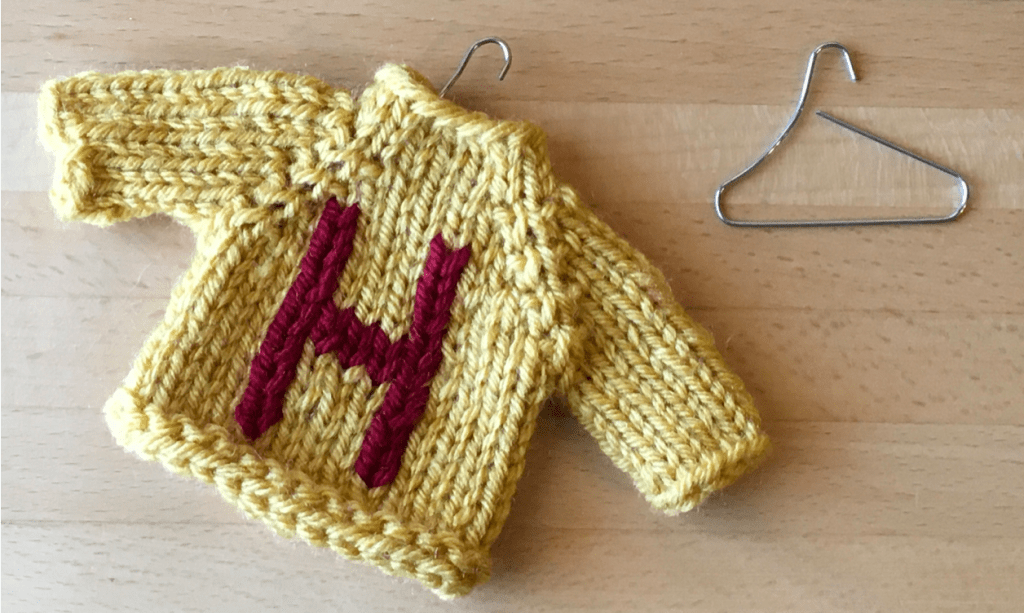
I adore the pattern for these little Mini Weasley Sweater Ornaments, as I adore all things Harry Potter. Each Christmas I make an ornament for all 12 people in my immediate and immediately-extended family, and this was the one a couple years ago after we all visited the Wizarding World of Harry Potter at Universal Studios in Orlando. The ornament is a raglan-style sweater that knits up quickly on double pointed needles using worsted weight yarn. The letters are added using duplicate stitch; my go-to resource for the letter patterns is from Purl Soho. Lions Brand Vanna’s Choice yarn is soft, easy to find, and offers colors for all the Hogwartz houses, so is my go-to yarn for Harry Potter projects. The letters will look best if you use the same type of yarn as the sweater.

A video overview of how to knit these sweaters is below, and you can learn how to do all the techniques in the lesson for this project. Or check out my other Harry Potter projects in the Gallery.

Pattern:

All credit for this pattern goes to https://www.ravelry.com/projects/telaneva/mini-weasley-sweater-ornaments.  This is simply written out so it’s easier for beginners to follow.  

Supplies and Notes:

US 6 DPNS
Small amount of worsted weight yarn (the same brand/kind of yarn in two colors will make the letters in duplicate stitch a little neater) 

Kfb = knit front loop then back loop (1 stitch increases to 2) 

Instructions for Raglan sweater from the top down: 

  1. CO 16 sts in the round. 
  2. K3 rounds even 
  3. Kfb, K1, Kfb twice, K3, Kfb twice, K1, Kfb twice, K3, Kfb (24 sts total) 
  4. Knit one round even 
  5. Kfb, K3, Kfb twice, K5, Kfb twice, K3, Kfb twice, K5, Kfb (32 sts total) 
  6. Knit one round even 
  7. Kfb, K5, Kfb twice, K7, Kfb twice, K5, Kfb twice, K7, Kfb (40 sts total) 
  8. Knit one round even 
  9. Kfb, K7, Kfb twice, K9, Kfb twice, K7, Kfb twice, K9, Kfb (48 sts total) 
  10. Knit one round even 
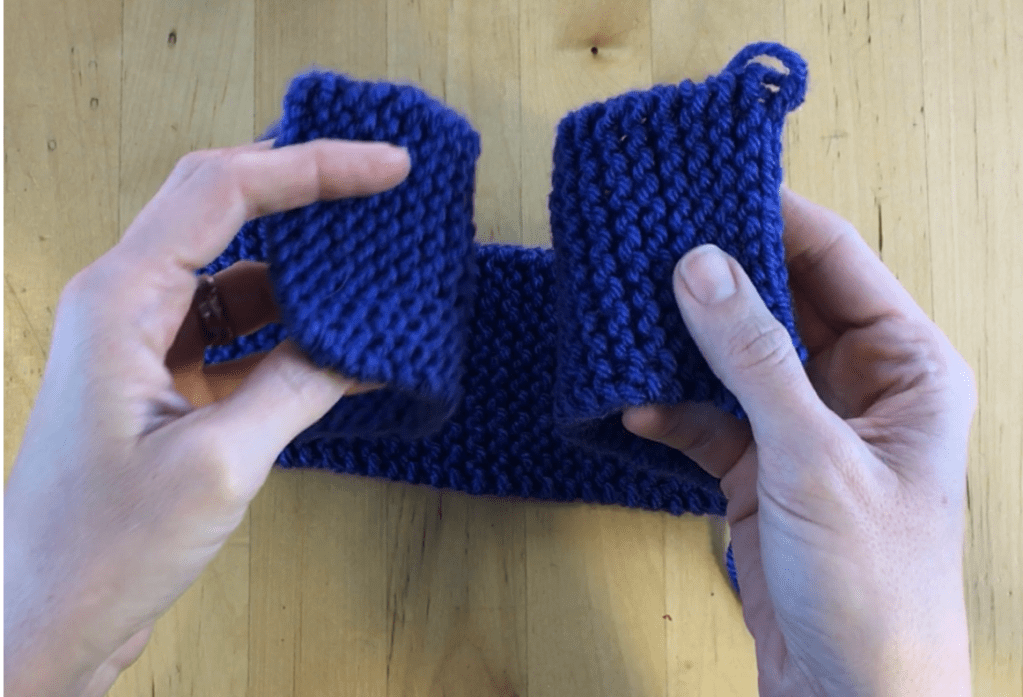
  11. Arrange your needles so the next 11 stitches are on one needle (starting with the first stitch after the stitch marker – these stitches will become one of the sleeves,) 13 stitches on the next needle (this will be the front of the sweater,) 11 on the next (the other sleeve,) and 13 on the last one (the back of the sweater.) See image 1 below.
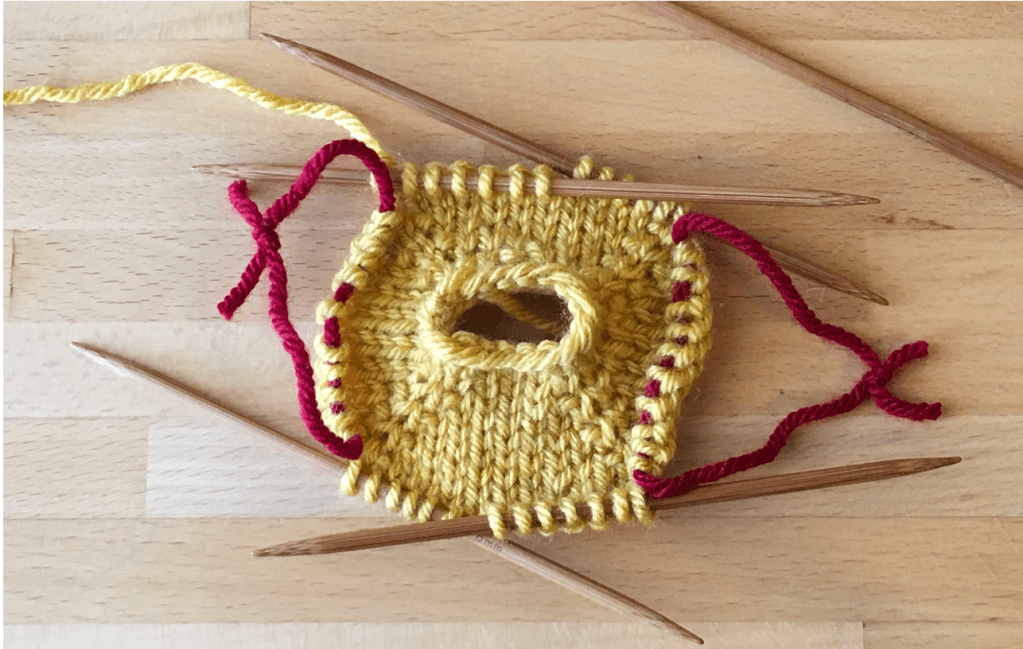
  12. Transfer the stitches on each of the needles with 11 to scrap yarn; those will become the sleeves.  
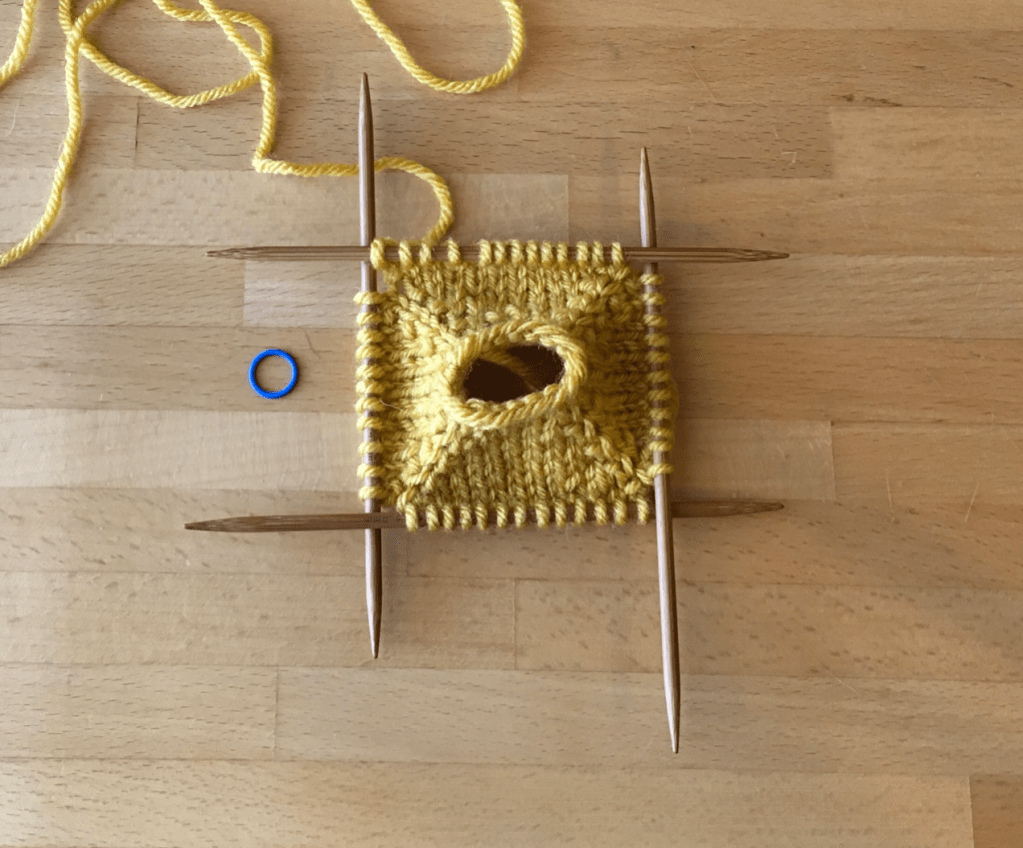
  13. Redistribute the stitches across 4 needles.  See image 2 below
  14. Knit main body around even until have 22-23 rows, counting from cast on edge (not from sleeve split).  End this row in the middle of the back of your sweater.
  15. P1 round
  16. BO in knit
Image 1: Step 11 above
Image 2: Step 13 above

Sleeves and finishing: 

Download a Free PDF:

Video Demonstration:

Watch the following video tutorial on how to knit the Mini Weasley Sweaters:

February Lady Sweater

The February Lady Sweater was the first sweater I knit and was a great pattern to use. (Well, it was the first sweater I knit if we don’t count these Weasley Sweater Ornaments.) I always try to do top down sweaters so I can try them on for fit as I go. The lace work is really interesting in this pattern so it seemed like it knit up pretty quickly. I used Juniper Moon yarn, which is extra soft. My best tip is to place a stitch marker between every repeat so you’ll know right away if you get off in your pattern.

Reindeer Antlers

These crocheted reindeer antlers are a great pattern and came out a perfect fit on the first try without needing to make adjustments. The sweater is my the basic dog sweater pattern I often use. After a few days of practice, they were happy to wear the antlers . . . well, they were willing to do so in exchange for treats. That seems win-win!

Crochet Dog Sweater

I’ve made dozens of dog sweaters. I often offer a custom-made dog sweater as a charity auction donation, which is a unique item that a lot of people seem to enjoy. This is my favorite go to pattern, which is easy to make-to-fit by trying it on the dog as you go. It also crochets up quickly – it can be made in just a few hours. You’ll notice I took some artistic license with some of the sweaters below, but they’re all at least loosely based on this pattern, which is available in different sizes. I also shared the pattern for the reindeer antlers.

P.S. We often get asked how we got the Christmas card shot of our dogs. We taught them the command “photo ready” so they would sit still and look at the camera, and after a few weeks of practice they’ll sit there for long enough to take several photos. There’s also a picture of them in Harry Potter Halloween Costumes in the Gallery.

Double Knit Coffee Coasters

These cute coffee cup coasters are a really nice small project to learn how to do double knitting. Double knitting is a technique that gives you a two-sided project, each in stockinette.  The finished project is completely reversible and great for interesting color work. It’s often used for scarves, or in this case coasters.

elow are a few videos I used that were helpful for me to get started. After looking at a lot of different patterns, this is one I developed that worked with worsted weight yarn (I used cotton.) A lot of the patterns available on Ravelry use much smaller yarn (such as these amazing Hogwarts book scarves), but when I was first learning I wanted a project that would come together quickly with worsted weight yarn.

These are the video tutorials I used to help me and are referenced in the coaster pattern:

Garter Stitch Ear Warmers

These Garter Stitch Ear Warmers make a great beginning knit project because, in addition to the headband knit in garter stitch, they have a small decorative band knit in stockinette. Plus the pattern knits up quickly and looks great!

Beginner’s Knit and Purl Fingerless Gloves Pattern and Video

This Beginner’s Knit and Purl Fingerless Gloves pattern is an ideal project for a beginning knitter. Knit on straight needles with worsted weight yarn and then stitched together, each glove works up quickly and has an interesting texture. There’s also a matching Beginner’s Knit and Purl Hat pattern.

You can view the original pattern, or I made a few slight adaptations to the pattern to make the gloves longer and make the pattern a little easier for me to read; the adapted version is available to download:

The following video walks through the project. More detailed videos for each step can be found in Lesson 3 on the Learn2knit section of the site.

Ready for More?

You might also be interested in the matching hat pattern:

Beginner’s Knit and Purl Hat

Beginner’s Knit and Purl Hat

If you can knit and purl, you can knit this Beginner’s Knit and Purl Hat. Knit on straight needles and stitched together, it also provides good practice following a pattern. There is also a matching pair of fingerless gloves. Knit with worsted weight yarn on size 8 needles, it’s a great beginning knit project.

Harry Potter Scarf

I am a huge Harry Potter fan, which is easy to see if you spend time looking through my Gallery. This Harry Potter scarf is a great beginning knit project that is knit in the round on 16″ size 8 needles and gives the knitter practice changing colors of yarn. Knitting in the round creates a tube that results in a double-thick scarf in stockinette that doesn’t have a “wrong” side that’s visible. That also means the finished scarf is very satisfyingly thick and warm. Lions Brand Vanna’s Choice yarn is soft, easy to find, and offers colors for all the Hogwartz houses, so is my go-to yarn for Harry Potter projects. You might want to check out this video on changing colors and knitting a jogless join, to help make it less noticeable when you change colors. And this video shows how to add the fringe.

Twisted Headband Pattern and Video

This Twisted Headband is a great beginning knit project knitted in garter stitch. The pattern is below (free PDF download at the bottom of the page), and you can watch a video that walks you through the whole project step-by-step. You only need to know how to cast on (I suggest the Continental Cast On), knit, and bind off, all of which are discussed in this Beginning Knitting Lesson.

Pattern

 Materials:

  • Size 8 knitting needles
  • Approximately 35 yards worsted weight yarn 
  • Measuring tape
  • Scissors
  • Darning needle 

Directions:

  1. Cast on 12 stitches
  2. Knit every stitch.  Repeat until the headband measures 21” (or 1” less than the circumference of the head.
  3. Bind off and leave a 10” tail. 
  4. Fold the headband in half (see image 1 below.)
  5. Fold each of the ends in half (see image 2 below) and sandwich them together (see image 3 below.)
  6. Whipstitch through all four layers.  
  7. Weave both ends into the wrong side of the headband.
Image 1: fold the headband in half
Image 2: Fold each of the ends in half
Image 3: Sandwich them together

Down the Free PDF Pattern:

Video Demonstration:

Watch the following video to learn how to knit the twisted headband: