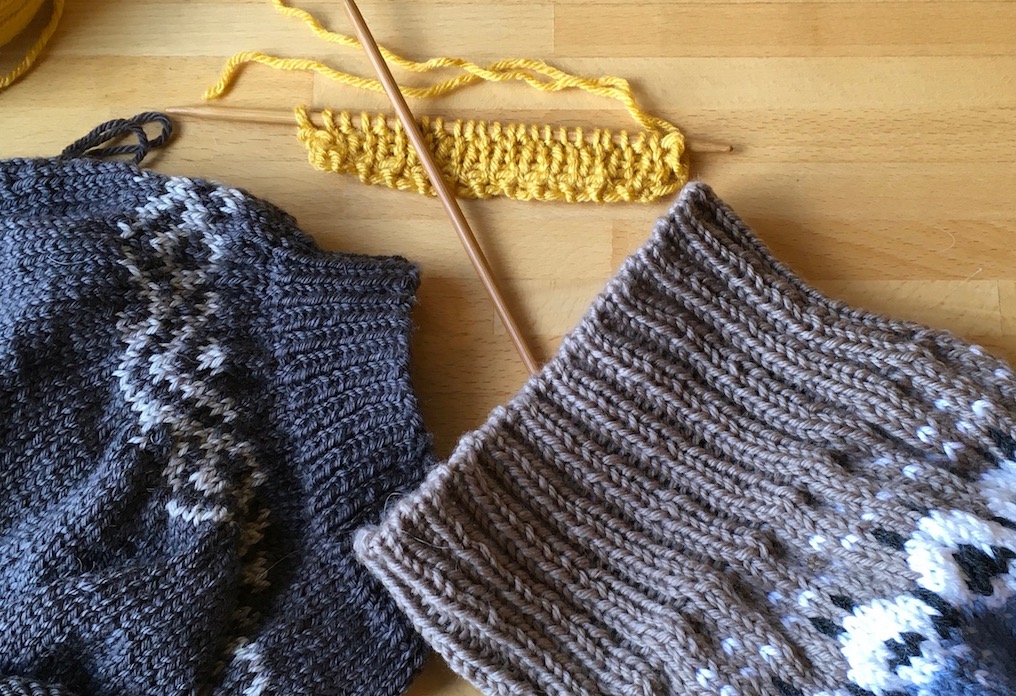
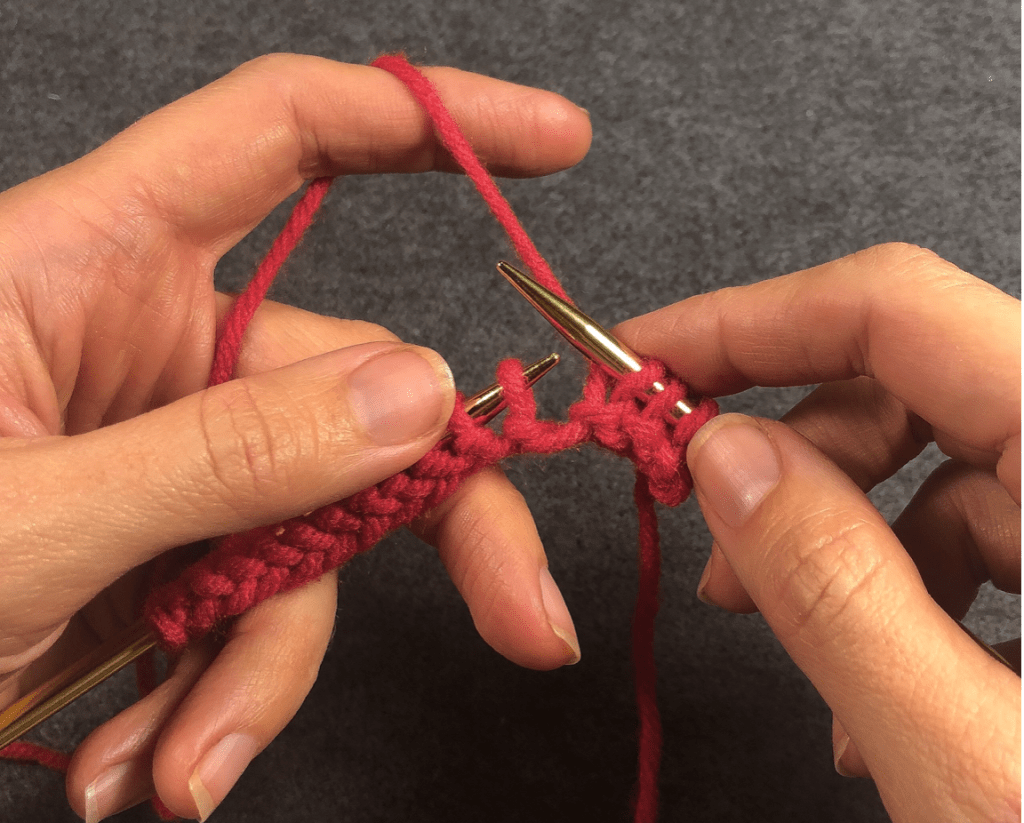
Rib stitch is made by alternating knit and purl stitches, usually knit 1 purl 1 (K1P1 or one-by-one rib) or knit two purl two (K2P2 or two-by-two rib). It makes a very stretchy fabric such as at the end of a pair of gloves, top of a pair of socks, edge of a hat, or neck of a sweater. However, it’s easy for rib stitch to look untidy. One trick is to knit your first purl stitch each time a little tight. Check out this video to see how it’s done:
Knitting is one of my many creative hobbies. Taking time for ourselves, time for fun, can seem selfish, but we can’t serve others from a place of suffering and depletion. I have come to learn we must be diligent about making time for self-care, which includes both rest and play. Knitting, along with baking, playing music, and other artistic endeavors, creates a cushion of joy that helps me feel grounded and makes it a little easier to respond to life’s challenges with patience and compassion. Time in my art space nurtures my soul, and I believe knitting can do that for anyone. It is joy, creativity, and an opportunity to practice mindfulness all rolled into one!
The Cushion of Joy site was designed for those who love to learn, as I do. I have often taught classes on knitting and crochet, and thought it would be helpful to provide a resource for when students are practicing on their own after class. I’ve included lessons for beginning knitters, instructional videos, patterns for beginners and more experienced knitters, resources that can be helpful when planning a project or working through a pattern, and a variety of other tips and tricks.
Need more help? Feel free to reach out to me at cushionofjoy@gmail.com. I wish you much joy on your creative journey.
In this lesson, you’ll knit a Garter Stitch Coaster. You can either work through each of the following in order to learn each of the steps required to knit the coaster, or you can jump straight to the pattern and tutorial video for the coaster and come back to this page if you need more assistance with a particular step. Here are all the skills you’ll learn in this lesson:
This lesson starts by providing a list of the two to four items you need to get started with your knitting. After that, I’ll share everything I keep in my knitting bag, and the other knitting tools I keep close at hand.
Getting Started with Knitting
All you really need to get started knitting is a skein of yarn and pair of knitting needles in the corresponding size. To work through these next several lessons, I recommend a pair of straight, size 8 knitting needles and a skein of worsted weight yarn in a light color. The following provides some additional detail to help you sort through the choices:
Knitting Needles
Straight Needles: To get started, you will want a pair of straight knitting needles. There are several kinds of knitting needles; more information on that is below. Straight needles have a point on one end and some kind of a stopper at the other.
Straight Knitting Needles
Size. Each needle has a size, which corresponds to the diameter (e.g., US size 8 needles are 5mm); you need needles that are appropriate for your weight of yarn (it tells you the weight on the yarn label.) Most of the beginning patterns on the site will work with size 8 needles and worsted weight yarn, which is medium size 4 yarn.
Material. Knitting needles come in a variety of materials, such as aluminum, bamboo, wood, nickel, etc. Wood are my favorite; aluminum are the cheapest but a little slippery (some people like that and some don’t); bamboo is another option with a little more grip than metal. Any material is fine for getting started. Long term, whether you choose metal, wood, or bamboo is a matter of personal preference. For slippery yarn, I like wooden needles; for “grippy” yarn, I like nickel needles. Do what feels the most comfortable for each project.
Length. Knitting needles come in a variety of lengths. To get started with your knitting, they can be any length, although shorter needles (such as 8 or 9”) are often easier for a new knitter to maneuver.
Recommendation. For a simple solution, you wouldn’t go wrong with these needles from Amazon or these from Michael’s.
Yarn
You will be able to make several of the beginner patterns on the site with one skein of worsted weight yarn in a light color. The light color makes it a lot easier to see the stitches when you’re learning.
Material. When starting out, there is a lot of nice, affordable yarn available at Michael’s, Hobby Lobby, or other similar craft stores. Note that acrylic yarn is the cheapest, and often easy to use, but usually can’t be ironed without melting. As you progress, it’s great to find a yarn store nearby and graduate up to more high end wool and alpaca yarns. My favorite shop in the Oklahoma City area is Yarnatopia.
Weight. Yarns come in a number of different weights. To tell the weight, it will either say it’s worsted weight or sometimes will have a number on the label; worsted weight is a size 4 medium yarn. The Resources page includes a chart of the standard yarn weights.
Recommendation. To get started, I suggest getting a light colored skein of Vanna’s Choice, Red Heart, or Caron Simply Soft yarn in worsted weight (size 4 medium.)
Other Supplies for Getting Started
Yarn Needle. To finish your project you will need a sewing needle the correct size for yarn. Here is one option but really any will work.
Yarn Needle and Case
Scissors. You’ll also need a pair of scissors. Small scissors, or ones with a cap, are often handy to keep in your knitting bag, but any kind will work.
Small Scissors
While there are lots of other knitting tools to acquire over time, you can really knit a good number of projects with just those four above.
In My Knitting Bag
The following are some of the other tools I keep in my knitting bag. I had a lot of questions about different tools when I was learning to knit so decided to share some of those answers here.
Needles, Needles, and more Needles
There are several types of knitting needles, which you will need in the correct size and shape for each project. The following are several types of needles that get used for different kinds of projects:
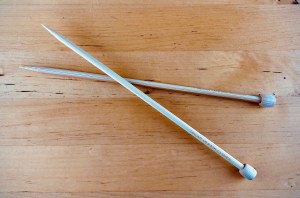
Straight needles. As mentioned above, straight needles have a point on one end for knitting and a cap on the other; you need a matched pair. They come in different lengths.
Straight Knitting Needles
Circular needles. Circular needles can be used for working in the round or as a substitute for straight needles. They come in different sizes of needles with different lengths of cables.
Circular Needles
Double pointed needles (DPNS). DPNS are used for smaller projects that are worked in the round and they have points on both ends; you typically need five to do a project, which is how many come in a set.
Double Pointed Needles
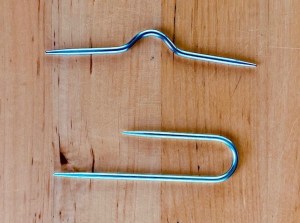
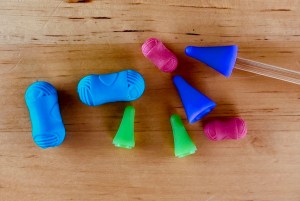
Cable needle. A cable needle is a tool used to help make cables in knitting, such as on these ear warmers. One size cable needle will work for all projects. I prefer the u-shaped one.
Different examples of cable needles
Interchangeable needle sets. If you ultimately knit a lot, you will end up buying lots of different pairs of needles. At some point, an avid knitter will often find it’s more affordable to buy a set of interchangeable needles. These are circular needles that allow you to attach different sized needles to different lengths of cables. Circular needles can be used instead of straight needles in most projects, so while an interchangeable set is more expensive up front than a single pair of needles, over time they can be more versatile, affordable, and easier-to-organize. The ones I use most often are by Lykke, although I also own and recommend Chiagoo and Knit Picks sets.
Lykke Interchangeable Needle Sets
Beyond Needles
In addition to knitting needles (lot of needles), plus scissors and yarn needles as I mentioned above, I also keep the following in my knitting bag:
Fingernail clippers. These are handy when I’m traveling and not allowed to bring scissors.
Large safety pins. I often reach for a safety pin in the middle of a project.
Small crochet hook. A small crochet hook helps pick up dropped stitches or repair mistakes. You can save a lot of time and frustration with a crochet hook in your bag.
Pencil. Having a pencil close at hand is often helpful.
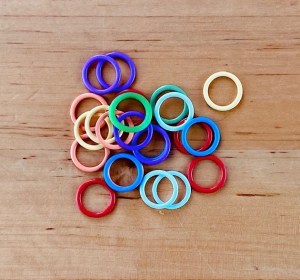
Stitch markers. These are small circles to help mark rows or changes in patterns. Each marker sits between stitches and easily can be slipped from the left needle to the right.
Stitch Markers
Rulers. I regularly use both a firm (wooden or plastic) 12 inch ruler and a 10 foot flexible ruler (retractable is ideal.)
Firm and Flexible Rulers
Needle caps. These go on the ends of your needles and keep the stitches from slipping off when you put your work down in the middle of a project.
Needle Caps
DPNS holder. Another kind of protector to keep your work carefully on the needles when you put it down is a holder for double pointed needles (DPNS.) The needles fit in the case and your work (such as a sock you’re knitting) can remain on the needles extending from the space between the case snaps, which keep the loops from being able to slip off the ends of the needles.
DPNS Holder
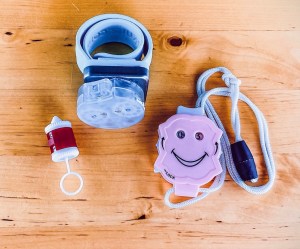
Row counter. As the name implies, this helps you count each row to keep your place in the pattern. There are several different kinds and shapes available available, such as ones that hang on the needle, wrap around your finger or wrist, or hang around your neck. The Knit Companion app described below also includes a digital row counter.
Row Counters
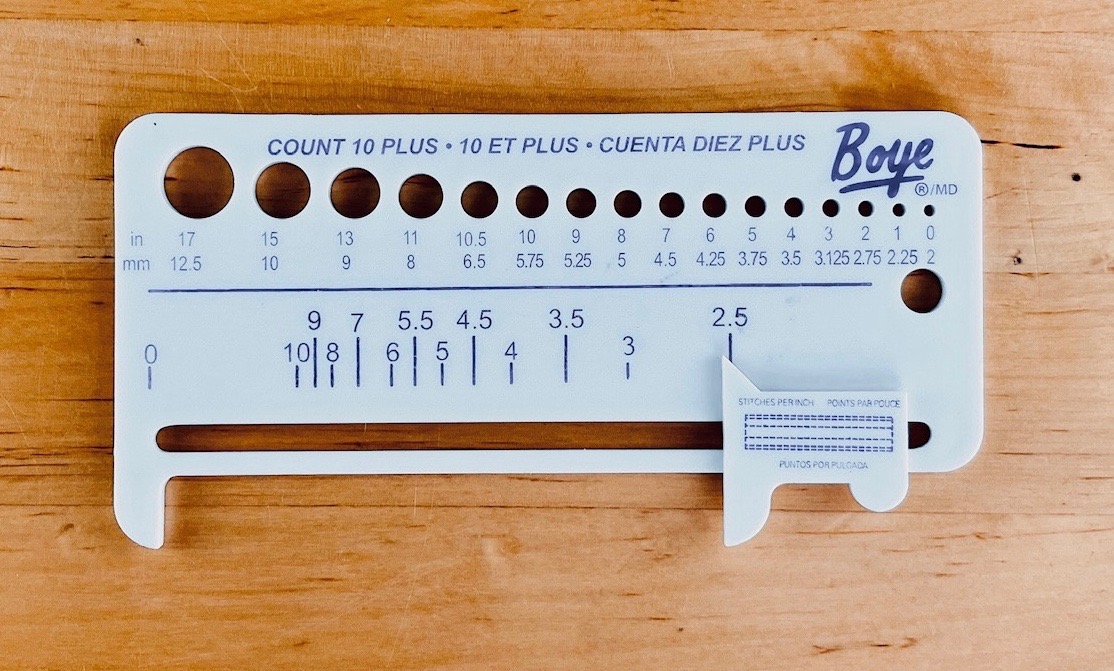
Knitting needle size measurement tool. This is usually a piece of plastic that has holes that match the different sizes of knitting needles, in case your needles don’t have (or you can’t read) the number printed on the side.
Needle Measurement Tool
Knitting lamp. This hangs around your neck and the bendable arms allow you to shine light directly on your project, which is helpful if you’re knitting in a dark room, such as while watching a movie (although I don’t recommend these at the theatre.) It’s also often helpful to have more light directly on the project when working with darker colored yarn.
Knitting Lamp
Other Knitting Tools
Finally, there a few other tools I could not live without in connection with my knitting:
Ravelry. This is an online library of knitting patterns and other information. Some of the patterns are free while others cost a few dollars. You can like and save downloaded patterns into your Ravelry library. This is a resource used by almost all knitters.
Ravelry – an online pattern resource
Small project bags. I have a variety of bags in different sizes that I use to hold works-in-progress. I like to have each project I’m working on in its own bag. These bags are my favorite.
Small Project Bags
Small mesh bag. I like to keep a small mesh bag with little tools that can easily be moved between project bags and keeps things from getting lost.
Small Mesh Bag to Hold Little Tools
Knit Companion app. This app is amazing and where I store all my patterns. It has a highlighter line that allows you to keep your place as you go, and also includes a digital row counter. While it works on a smart phone, I find it’s easier to use on my iPad. It integrates with both Ravelry and Dropbox.
Sample of Knit Companion
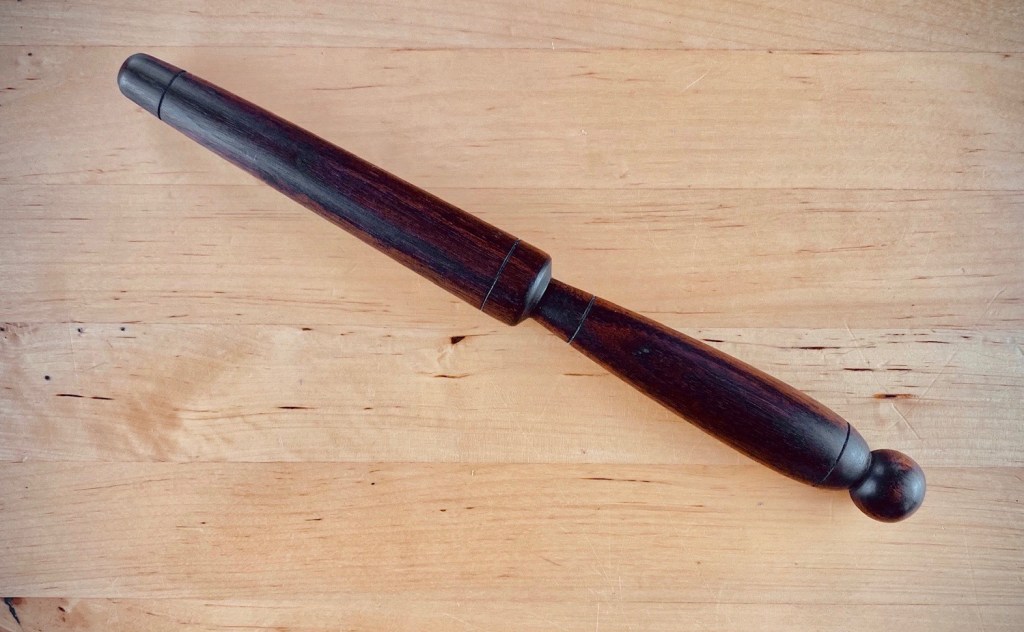
Winder and Swift. Nice yarn, such as good quality wool, comes in a hank instead of a ball. You need to wind it before using it to knit. A good yarn store will offer to wind it for you. If you aren’t able to get it wound (perhaps because you’ve ordered online), you can purchase a winder and swift to wind it yourself. The other option is a handheld winder, which is harder to use but certainly smaller and more affordable if you don’t need to wind yarn often; I bring it with me when traveling for last minute winding needs.
Winder and Swift
Hand Yarn Winder
Resources
Finally, there are a few reference materials I keep close at hand, which can be found on the Resources page.
I hope that’s helpful. Feel free to post a question in the comment section or drop me an email. Happy knitting!
A Garter Stitch Coaster is great for a would-be-knitter’s very first project. It’s relatively simple while still teaching several important skills that all knitters use. This one uses the continental cast on, knit stitches to make garter stitch fabric, and a simple bind off method. The pattern is available to download, and the video below shows an overview of the whole process. More descriptive videos for every step are available in Lesson 2 on the Learn to Knit page.
Materials:
You’ll need the following materials for the coaster:
US Size 8 needles
3 ounces worsted weight yarn (about 20 yards); cotton is the most absorbent
Instructions:
Cast on 16 stitches.
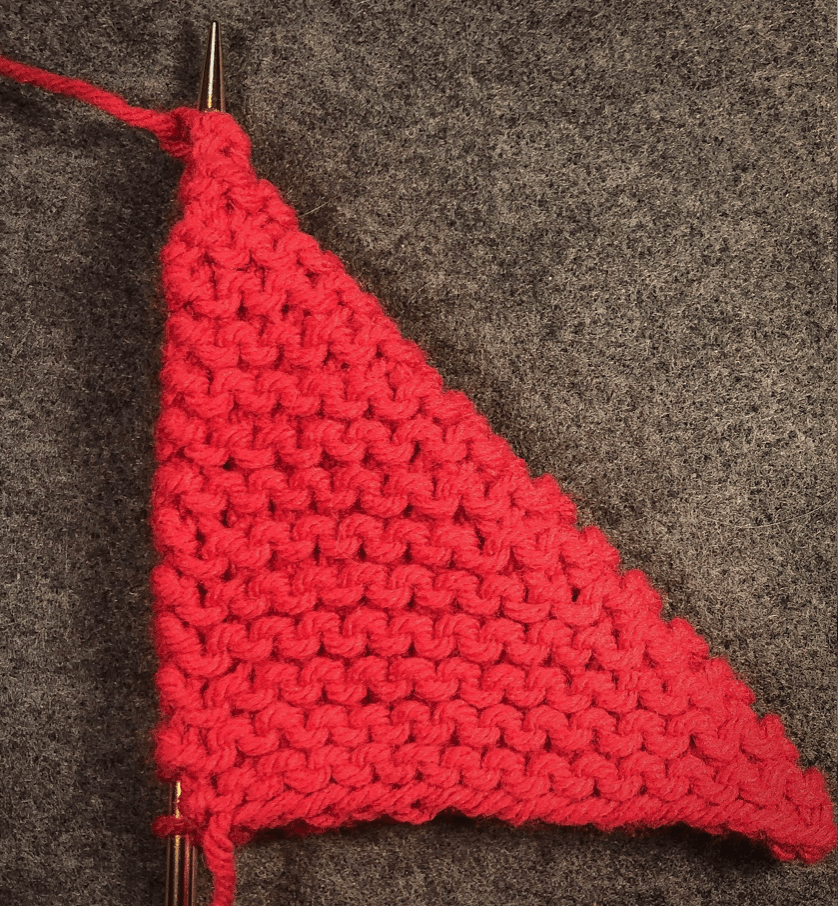
Knit each row until the coaster is a square. Tip – fold into a triangle shape to test if the length is as long as the width; see picture below.
This video shows how to pull the yarn from the center of the skein, which will help it keep from getting twisted while knitting or crocheting your project:
Most knitting cast on methods start with a slip knot. The following is a slow motion demonstration of how to tie a slip knot. The steps are repeated several times so you can practice along with the video.
Everyone holds their yarn a little differently when knitting. Two main camps are divided between knitters who hold the yarn in their left hand (Continental Knitters or “Pickers”) and those who hold the yarn in their right hand (English Knitters or “Throwers.”) Even within those groups, there is much variation. The following notes and the video below show how I hold my yarn to knit Continental:
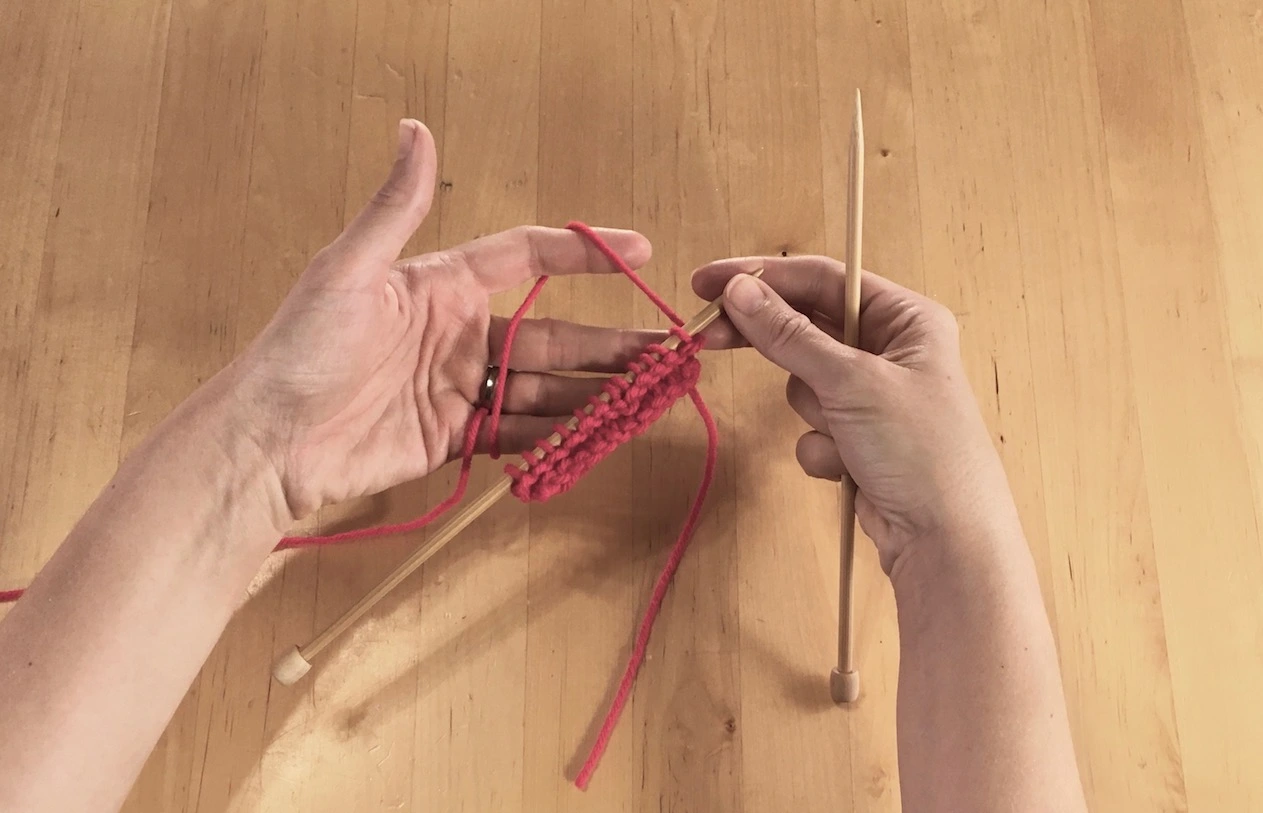
Wrap the yarn from the ball (the “working yarn”) around your left pinky finger, then across your palm and over your index finger with the yarn coming off the front of your index finger and to your work. Then wrap your left hand gently around the left needle. See Figure 1 below.
I like to hold my right need like I would a chef knife; some people hold it like a pencil.
Keep your two hands and the tips of the needles close together, like in Figure 2 below.
The left hand is in charge of the yarn, the right hand needle is the one moving around to do the work. If you’re using straight needles and working back and forth on a flat piece of work, you’ll work stitches on the left needle and move them to the right needle as you make each new stitch. At the end of the row, you put your right needle (with all the stitches) into your left hand and the now-empty needle into your right hand, and begin again.
Note that your work will look the most even if you move the stitches down the right needle every 3-4 stitches, rather than letting them stay scrunched up near the tip of your needle.
Figure 1
Figure 2
The following video shows how to wrap the yarn around your left hand step-by-step. The instructions are repeated several times so you can follow-along. I suggest you at least tie a slip knot onto your needle before starting the video.
Keeping your yarn and stitches sorted out can be tricky for a beginning (and sometimes an experienced) knitter. The following are some yarn and stitch orientation tips:
Unless instructed otherwise, always wrap the yarn counter-clockwise (for both knit and purl). You may also want to check out this video demonstrating which way to wrap the yarn and how to move the yarn under the needle at the end of the row to be set up correctly for the next row.
When making a knit stitch, the yarn needs to start at the back; when making a purl stitch, the yarn needs to start at the front.
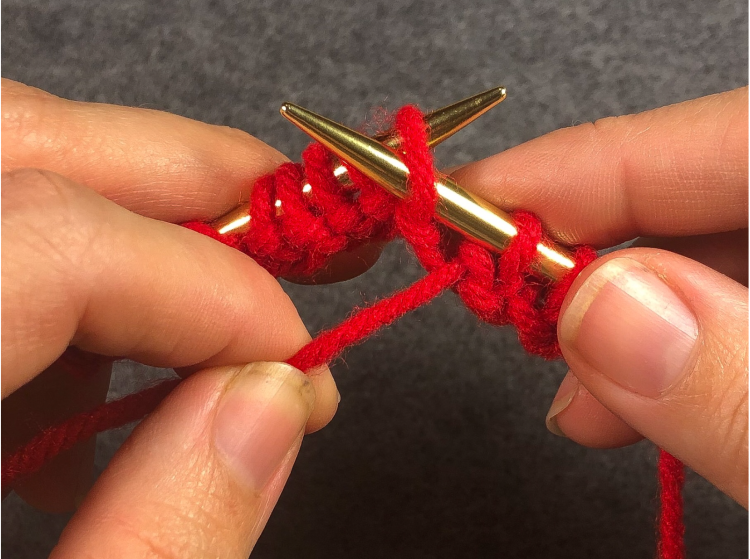
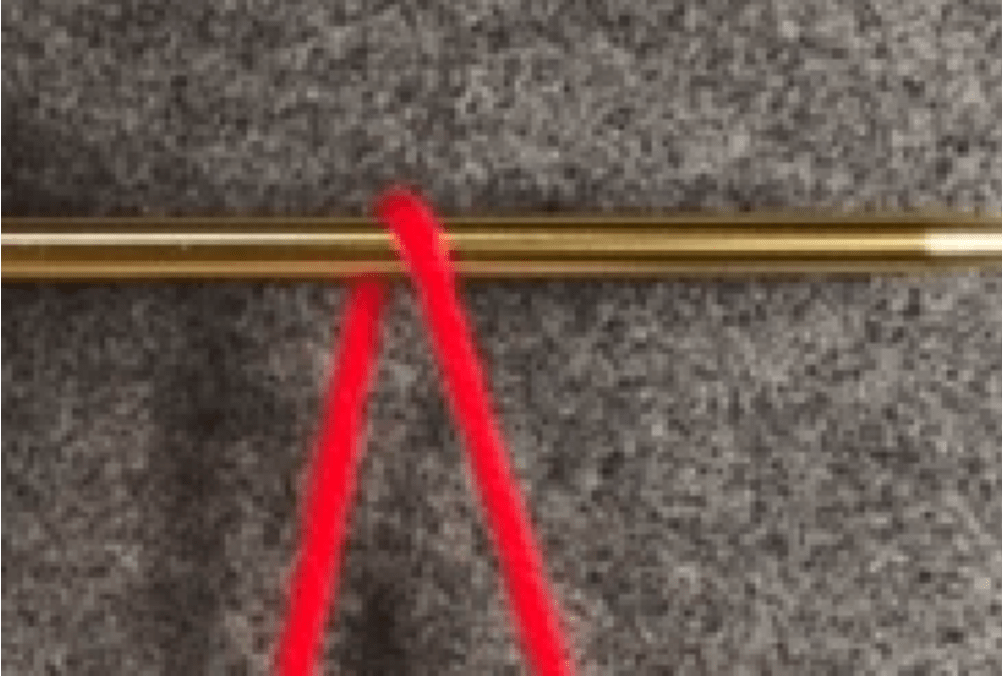
Stitches need to sit the correct way on the needle or they will be twisted. See Figure 1 below, which is correct – the yarn in front on the needle is going toward the right. This is true for both knit and purl stitches, and if you’re working on either the front or back of the work.
If you put your work down partway through a row, make sure you have it oriented correctly before you resume your stitches. (If not, you’ll end up going backwards starting partway through your row.) If you’re in the middle of a row, the working yarn will be coming off the finished stitches on the right hand needle as shown in Figure 2 below. (When you start a new row, the yarn will come off the left need until you finish the first stitch, as shown in the photo above.)