In addition to cabling, this lesson includes the provisional cast on and three needle bind off, which create a beautiful finished seam when connecting the ends of an infinity scarf, cowl, or these ear warmers. You’ll need heavy worsted weight or light chunky weight yarn; I’ve used the both the Cascade Yarns Baby Llama Chunky and Vanna’s Choice Yarn by Lion Brand. You’ll also need the correct needles for your gauge (the pattern suggests size 10) and a cable needle. Print or download the pattern for the Cables with a Twist Ear Warmers and then check out each of the following instructional videos:
In this video you’ll learn how to knit cables. You’ll either need a cable needle (two different shapes are shown in the picture above) or can simply use a double pointed needle. Your pattern will tell you the “recipe” for the cables you’re going to knit. As a general matter, you will slip some stitches onto a cable needle and hold the needle to either the front of back of your work (as the pattern directs,) then continue working a set number of stitches from your main needle, then work the stitches from the cable needle.
If you hold the stitches to the back, that will create a right leaning cable.
If you hold the stitches to the front, that will create a left leaning cable.
While cables are one of the stitches that really make knitting fun, the good news is they’re also fairly straightforward once you understand how to knit them. Check out the following video to learn more:
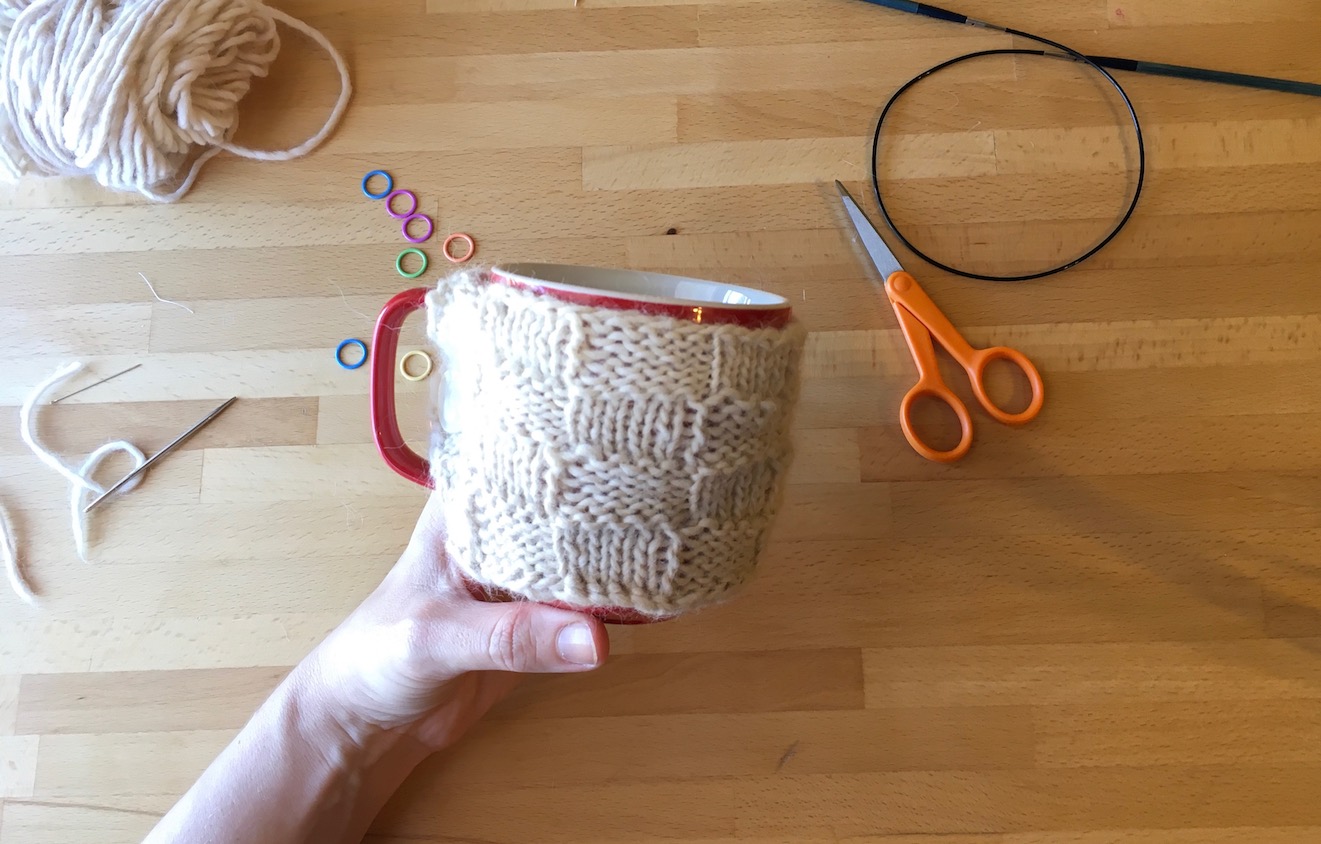
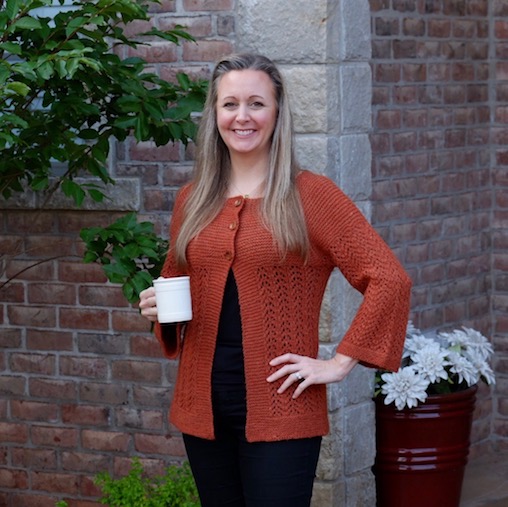
You’ll get to learn several new skills while knitting this cute Woven Mug Cozy and matching Coaster. You can either work through the following in order to learn each of the steps required to knit the mug cozy and coaster, or you can jump straight to the pattern and tutorial video, and come back to this page if you need more assistance with a particular step. Here are all the skills you’ll learn in this lesson:
Feel free to post a question in the comment section or drop me an email. Happy knitting!
Ready for more practice?
With the skills you have now, you can make this Sunny Baby Blanket. Be sure to put the tips I shared above on stitch markers and row counters to use with this pattern. Or check out all the available beginner knitting lessons.
Blocking your work can help relax and smooth out your stitches so they look more beautiful, and is essential on larger projects with shaping such as sweaters. Here are the basic steps:
Fill a small sink or bowl with cool water; mix with a small amount of Woolite or other soap made for wool,
Add your finished piece and let soak for 10 minutes,
Rinse well until all the soap is gone,
Press the piece very gently to get out some of the water, but do not squeeze or wring out your work,
Lay the wet piece on a towel and roll up to get out much of the water, repeating one to three more times until the excess liquid is out,
On a fresh towel, lay flat and shape how you want, and
Leave until dry, which could take between 24 hours and a few days for a large or thick item.
The following video shows you how to do the steps:
Fringe is a fun addition to some projects, like a scarf, shawl, or this Woven Coaster. The great news is it’s also easy to do, especially with a crochet hook. Learn how in the video below. If your fridge isn’t laying flat, a pro tip is to run a hair straightener set to low heat over the fringe. Note that heat can melt some acrylic yarns, so do a test with some scrap yarn first. Most natural fibers such as wool or alpaca would not be damaged by the straightener.
Want to Give it a Try?
The following patterns would work with fringe at the edge:
Learn how to sew a button, as shown when making the Woven Mug Cozy. You will need a button (the correct size for your project), a toothpick, thread, a needle the correct size for regular sewing thread, and scissors. Check out the video below for step by step instructions:
Jenny’s stretchy bind off is a very versatile and, as the name suggests, stretchy bind off that’s great for at the top of socks, mittens, etc. The stretch comes from a yarn over that you do right before each stitch, which gives you three stitches on the right needle. You then pull the yarn over up and over the last stitch on the right needle, and then pull the final stitch on the right needle and over the stitch on the left. The way you wrap the yarn for the yarn over varies depending on whether the next stitch you’re binding off will be a knit or purl stitch:
If the next stitch is a purl stitch, wrap the yarn for the yarn over counter clockwise around the right needle like usual.
If the next stitch is a knit stitch, wrap the yarn for the yarn over clockwise around the right needle.
Check out this video to learn more:
Want to Give it a Try?
The following patterns all use Jenny’s Stretchy Bind Off:
K2tog (knit two together) and P2tog (purl two together) are common methods of decreasing the number of stitches in a row. You do exactly as the name implies, inserting the right needle into two stitches from the left needle at the same time, and either knitting or purling them, well, together. This video shows you how:
A yarn over (abbreviated YO in patterns) is one way to increase the number of stitches in a row, or it can be used as a decorative stitch because it creates an eyelet hole in the knitting, as shown above. Essentially a yarn over is when you wrap the right needle with yarn but then don’t work that stitch, and instead continue on to the next stitch. However, it’s important to wrap the yarn the correct direction, which is demonstrated in the video below. Spoiler – you always wrap counter clockwise unless the pattern tells you otherwise.
Want to Give it a Try?
The following patterns use yarn overs as part of the lace work:
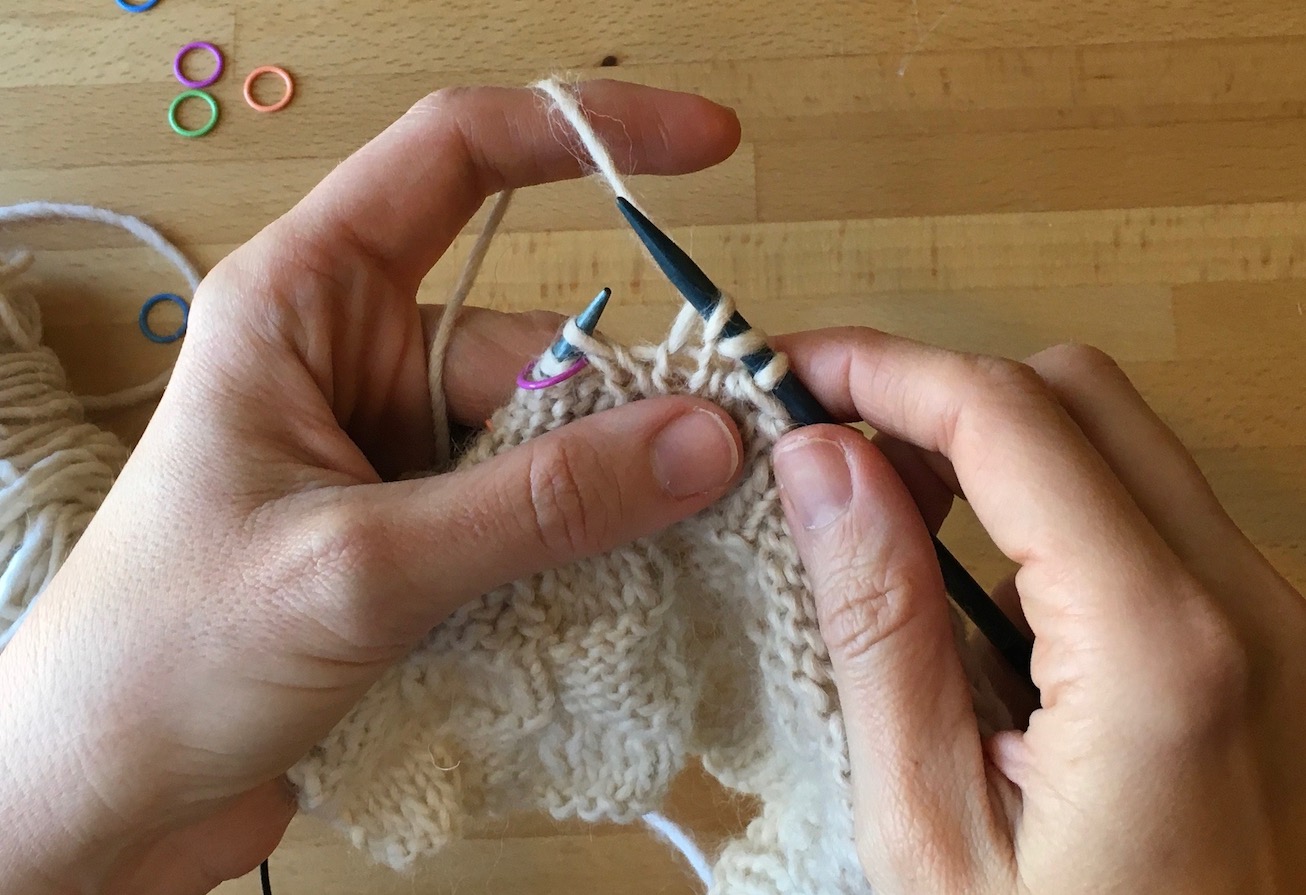
I find stitch markers and row counters to be really helpful with my knitting. I actually use a lot of stitch markers for two main reasons, both of which I illustrate in the video below:
Stitch markers mean I don’t have to count during a row to keep track of pattern sections, which makes it easier to knit while having a conversation or watching a movie without losing my place, and
More importantly, stitch markers provide a good check on complicated repeating patterns to make sure I didn’t miss a stitch. For example, let’s say I’m knitting a sweater in a lace pattern that repeats over 12 stitches. I place a stitch marker at the end of every repeat. If I reach a stitch marker but am not at the end of the 12 stitch pattern, I know there’s something wrong and can immediately fix it. The means I don’t have to wait until I get all the way to the end of the row and then go back to figure out where I had a problem; that’s particularly useful when knitting a sweater and “going back” can mean ripping out 200 or 300 stitches of complicated lace or color work. In that way, stitch markers significantly improve the quality of my work and save me a lot of headaches.
Row counters are also very helpful. There are a variety of styles available, such as the ones below that go on your wrist, hang off the needle, or hang around your neck. This one coordinates with the Coco Knits wrist band I mentioned above. Just as often, however, I use the row counter in the Knit Companion app, which is where I store all of my patterns.
Variety of row counters
I should maybe note here that I don’t get paid or otherwise compensated for any of these product recommendations. They’re just the ones I like, which I share in case that saves you time or headaches.