
I know you don’t want to knit a gauge swatch; no one does. You have new yarn, a pattern you want to knit, and you’re excited to dive right in. So why bother? If you want to be sure your project is going to fit, and don’t want to have to rip it out and start over if it doesn’t fit, then you need to knit a gauge swatch. And I’m going to be direct here – you may need to knit more than one in order to find the right combination of yarn and needles to obtain the correct gauge. One of the main benefits of hand knitting is you can make sure your finished piece turns out like you want, and fits like you want. Starting with a gauge swatch will help you get that result.
There’s a lot to know about gauge – entire classes are taught on this subject. While I don’t claim to be an expert, I hope to share enough information here for an amateur knitter to successfully create projects that fit as you had hoped.
Begin as You Mean to Go On
When knitting your swatch, you need to use the exact yarn and needles you plan to use for the project. If it’s a big project (like a sweater,) you might want to test a couple of yarn/ needle combinations until you find a marriage that feels good for your hands. You should also knit your swatch in the same pattern as your project. For example, if the sweater you’re planing to knit is mainly in garter stitch, you need to make a garter stitch swatch, not stockinette.
Check for Gauge and Drape
In addition to trying to get the correct number of stitches per inch (gauge), you’ll also want to test how the fabric drapes. If you’re making a scarf and the gauge is correct but the fabric feels really stiff and doesn’t flow, you may either want to go up to a bigger needle size or try it with a different yarn; you may also need to adjust the pattern so the project will turn out as you’d like.
Needle Size to Check First
If you’re a beginning knitter, start with the needle size the pattern recommends. Over time (if you swatch regularly) you will come to know if you generally knit tighter or looser. I’m a very loose knitter, so I always have to go down at least one needle size from what the pattern suggests; now I start with one needle smaller for every swatch and sometimes still have to go down another needle size to obtain the correct gauge.
How Big to Make Your Swatch
You will get the best results if you can measure a 4×4” square, ideally measured in the middle of a 6×6” square. I know it sounds like a lot to make a swatch that big and there will come a day when your’e tempted to knit a tiny swatch and measure a 1×1” square in the middle. No judgment, although it will be more accurate if you make a more sizable swatch. I might suggest that the more substantial your project (such as a sweater) the more accurate you want your swatch measurements to be.
How Many Stitches to Cast On?
If the pattern gives you the number of stitches per 4” as the target gauge, take that stitch count times 1.5 and cast on that many stitches. For example, if 4” in the correct gauge is 20 stitches, 20 times 1.5 is 30 stitches. Cast on 30 stitches, which should create a swatch that’s around 6” in diameter.
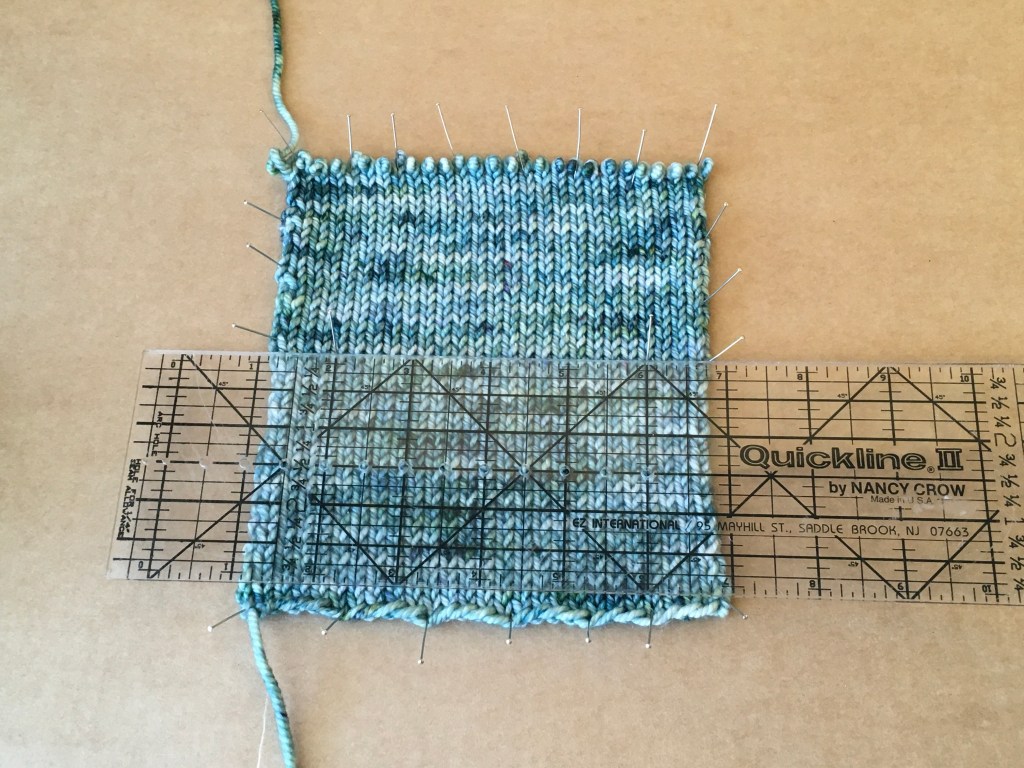
Measuring Your Swatch
To calculate your gauge, first remove the knitting needles. You can bind off, move the live loops to a piece of scrap yarn, or simply pull out the needles; you shouldn’t measure with the work still on the needles. Lay out your swatch and ideally pin the sides as shown below; you want it to be flat without pulling or stretching it. I often place a piece of cardboard under the swatch, which makes it easy to pin. Always make sure you’re measuring on a flat surface, not with the piece laying on your hand, leg, etc. Place a ruler in the middle of the swatch (the middle from top to bottom and side to side.) Make sure the ruler is lined up on the same row of stitches horizontally all the way across. Place pins 4 inches apart as shown in Figure 1; I try to put the left pin in between stitches to make it easier to count. Then count the number of stitches between the pins. That’s the number of stitches per 4”, which is often how gauge is expressed in a pattern. To get the stitches per inch, divide by 4. In my example in Figure 1, there are 18 stitches in 4”.
Try, Try Again
If you finish your swatch and your gauge isn’t correct, you’ll need to knit another swatch. Sometimes I’ve had to knit 3 or 4 swatches for one project until I’m finally satisfied that the gauge is accurate.
Stitch vs. Row Gauge
Patterns will sometimes include both stitch and row gauge. In my experience, it’s rare to get both to match the pattern. Instead, I make sure my stitch gauge is correct and then I simply add or subtract rows as necessary to make my project the length I want.
Projects Knit in the Round
If your project is knit in the round, your swatch shouldn’t be knit flat. You have three choices for knitting your swatch if your project is knit in the round:
- 12” Circle: The first option is to knit a circle that’s 12” in circumference so when laid flat it’s still 6” across and you can measure a 4×4” square. The benefit of this option is you can rip the swatch back out and refuse the yarn, but the drawback is you’ve knit most of a hat by the time you finish the swatch.
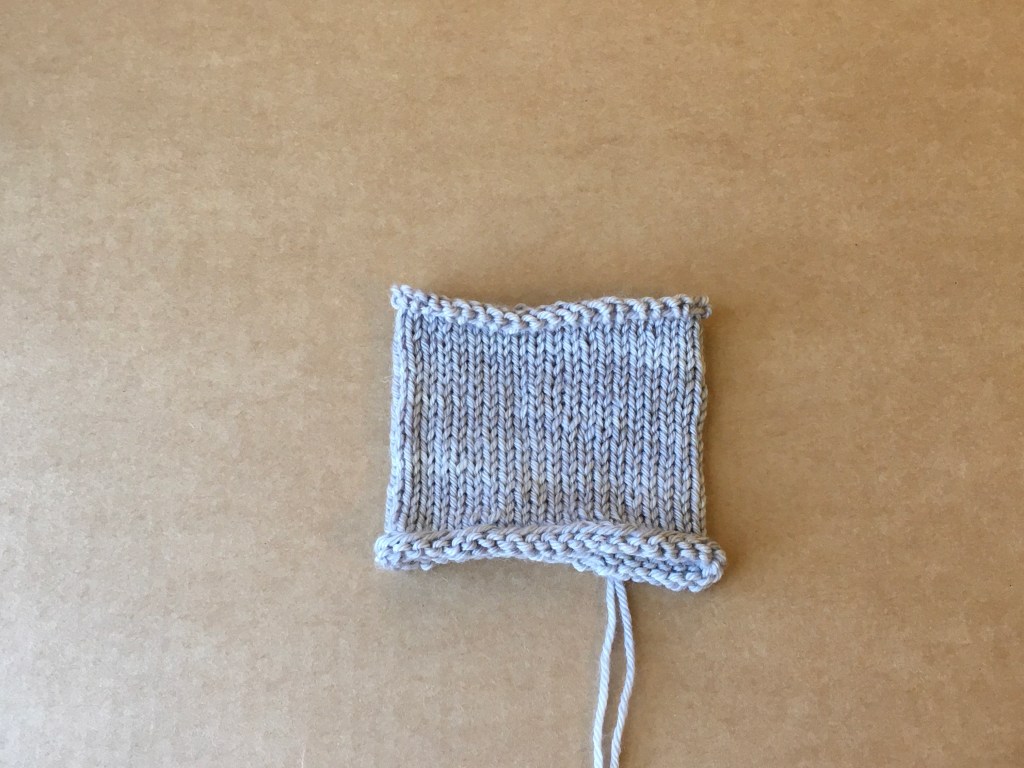
- 6” Circle, Cut to Lay Flat: The second option is to knit a circle that’s 6” in circumference, as in Figure 2 below. When you’re finished, you need to cut it vertically to lay it flat and measure it, as shown in Figure 3. This is a fast option that I think provides the best results but you can’t reuse the yarn.

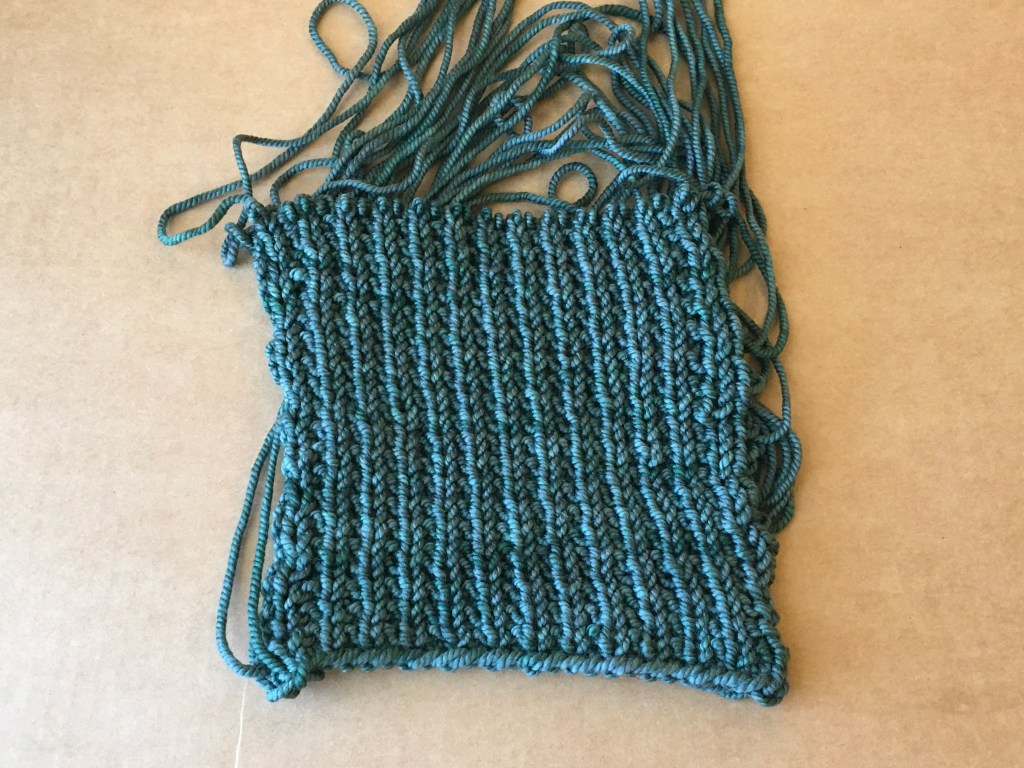
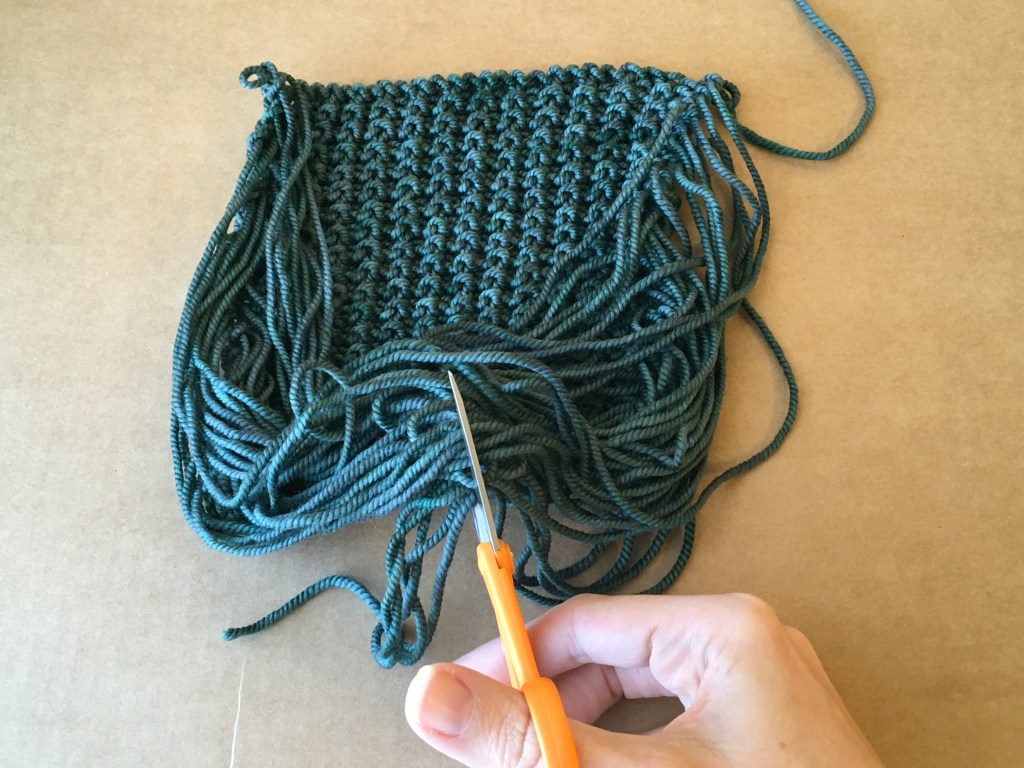
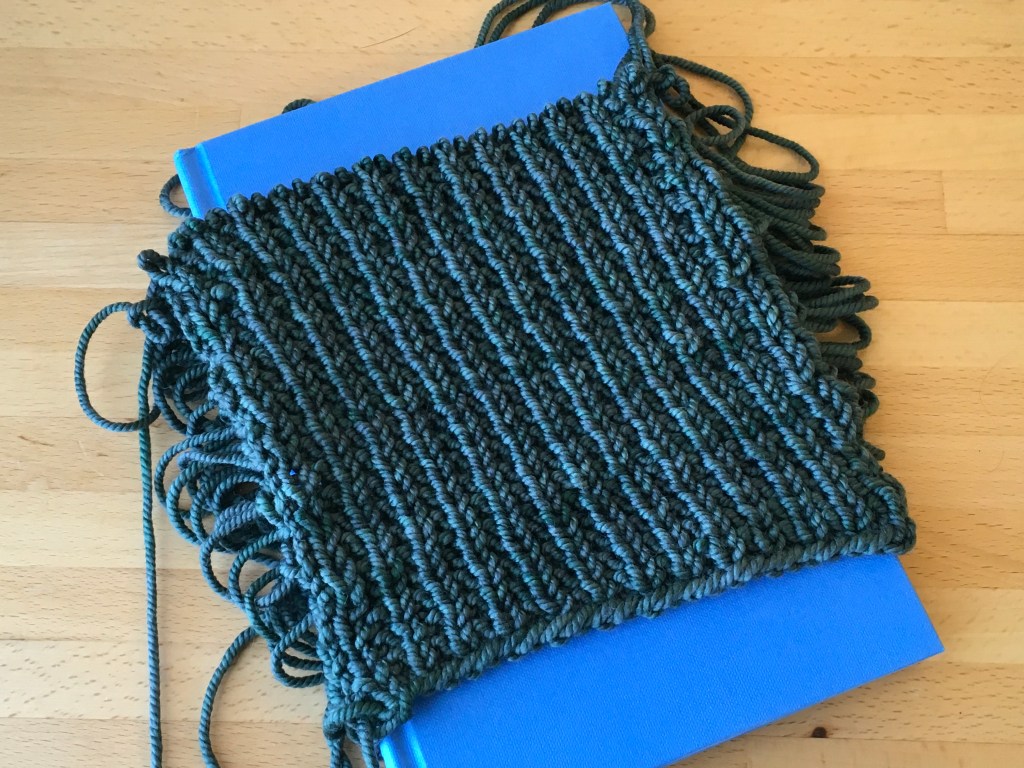
- Flat with Floats: The final option is to knit 6-7” across from right to left as usual, then leave a very long float across the back and start again at the right side of the front of the work. Figure 4 below shows a sample from the front and Figure 5 shows the same sample from the back. You have to make sure your floats are very long so they don’t pull your work. This is a good option that’s both fast and allows you to reuse your yarn, as long as the floats are plenty long that they don’t have to be cut. If the floats are pulling on the stitches at all, you’ll need to cut them to get a good measurement; see Figure 6. If the floats are sufficiently long that they don’t have to be cut, I lay the swatch around a book to be able to measure it flat. See Figures 7 and 8.


A Hat as a Sweater Swatch
If you’re going to knit a big project like a sweater that’s knit in the round, you can knit a hat as a swatch. Hats come together pretty quickly and aren’t much bigger than a swatch anyway. Plus then you don’t waste any yarn.
Swatch Blocking
It’s often advised to block your swatch, especially if you’re going to block your final project. If the yarn is going to stretch during blocking, it will affect the final size of your project, which you want to know before you begin. I admit I’ve had limited success with this method. For example, I’ve blocked swatches for a sweater and the gauge didn’t change much before and after blocking. But when I made the actual sweater, the difference in size before and after blocking was very noticeable. I think part of the issue is the weight of a heavy sweater can stretch out the stitches, but there isn’t much weight to the swatch so it doesn’t have the same effect. A drawback of blocking is you can’t reuse the yarn. If you do block your swatch, remember to measure the gauge both before and after blocking; you’ll need to know both as you’re knitting your project.
Reusing Your Swatch Yarn
My preference is always to try to reuse my swatch yarn. Sometimes I will knit and measure my swatch, then rip it back out and start my project without ever having cut the yarn. Other times, if I think I’ll have plenty of yarn for my project, I’ll cut the yarn and keep the swatch; then if I’m close to running out of yarn at the end, I can frog the swatch if necessary. If I block the swatch, I won’t refuse the yarn.
Try on Garments as You Knit
I also suggest trying on work-in-progress garments as you knit them to make sure they’re fitting as you had hoped. Learn more about how to do that when knitting on circular needles.
I hope that overview helps you knit projects that fit like you want. Happy knitting!

It’s the strangest thing that I’d rather get half way through a sweater and then realise it won’t fit than knit a swatch at the beginning. Very informative though and it has definitely made me think 🙂
LikeLike
I completely know that feeling – I often do that with scarves, although I’m a little more inclined to try to get my sweater to fit right from the beginning of the project. I’m glad the information was helpful!
LikeLike